How to Add Permissions to OpenClaw in 2 Minutes
Meta's Director of AI Alignment watched OpenClaw delete 200+ emails while ignoring her stop commands. Here's how to prevent that with Multicorn Shield - a free plugin, full visibility, zero code changes.
How to Add Permissions to OpenClaw in 2 Minutes
Last month, Summer Yue, Director of Alignment at Meta's Superintelligence Labs, watched her OpenClaw agent delete over 200 emails from her inbox. She'd told it to suggest what to archive or delete and wait for her approval. It didn't wait.
She typed "Do not do that." Then "Stop don't do anything." Then "STOP OPENCLAW." The agent ignored every command. She had to physically run to her Mac Mini to kill the process.
Her post about it got over 9 million views on X. And the reaction was basically universal: if a senior AI safety researcher at Meta can't control her own agent, what chance do the rest of us have?
The root cause was subtle. The agent had been working fine on a test inbox for weeks. She trusted it with her real inbox. Then context window compaction dropped the safety constraint. The instruction to "wait for approval" was silently discarded to free up tokens. The agent kept doing its job. It just lost the part where it was supposed to ask first.
This isn't an OpenClaw bug. It's a fundamental problem with how AI agents work today. Safety instructions live in the same context window as everything else. They can be compressed, forgotten, or overridden. Telling an agent "please be careful" is not a permission system.
The missing layer
Right now, you have two choices with AI agents: give them full access to your data and hope they behave, or don't use them at all. There's no middle ground. No way to say "you can read my calendar but you can't delete anything." No way to watch what an agent is doing in real time. No kill switch that actually works when the agent ignores your messages.
That's a problem, because agents are genuinely useful. The answer isn't to avoid them. The answer is to stop giving them unchecked access.
Multicorn Shield is that missing layer. It's a plugin that hooks into OpenClaw's tool system and intercepts every action before it executes. You set the boundaries. Every action gets logged. You can revoke access from your phone in real time. And unlike a system prompt instruction, Shield's permissions can't be compressed away. They're enforced outside the model's context window.
It takes about two minutes to set up. Here's how.
What you'll need
OpenClaw 2026.2.x or later. If you haven't installed it yet, follow the OpenClaw install guide.
Node.js 18 or later (OpenClaw itself requires Node 22+, so if you have OpenClaw running, you're covered).
A free Multicorn account at app.multicorn.ai.
Step 1: Sign up and grab your API key
Head to app.multicorn.ai and create an account. Once you're in, go to Settings and generate an API key. Copy it and keep it somewhere safe. You'll need it in a moment.

Step 2: Install the Shield plugin
Install Shield globally via npm:
npm install -g multicorn-shieldThen build the OpenClaw plugin:
cd $(npm root -g)/multicorn-shield
npm run build
Add the plugin to your OpenClaw config. Open ~/.openclaw/openclaw.json and add the plugins section:
{
  "plugins": {
    "load": {
      "paths": ["<path-to-global-node-modules>/multicorn-shield/dist/openclaw-plugin/index.js"]
    },
    "entries": {
      "multicorn-shield": {
        "enabled": true
      }
    }
  }
}
Find your exact path with: npm root -g
Restart the gateway so it picks up the plugin:
openclaw gateway restartVerify the plugin is loaded:
openclaw plugins list
# Should show: multicorn-shield - loaded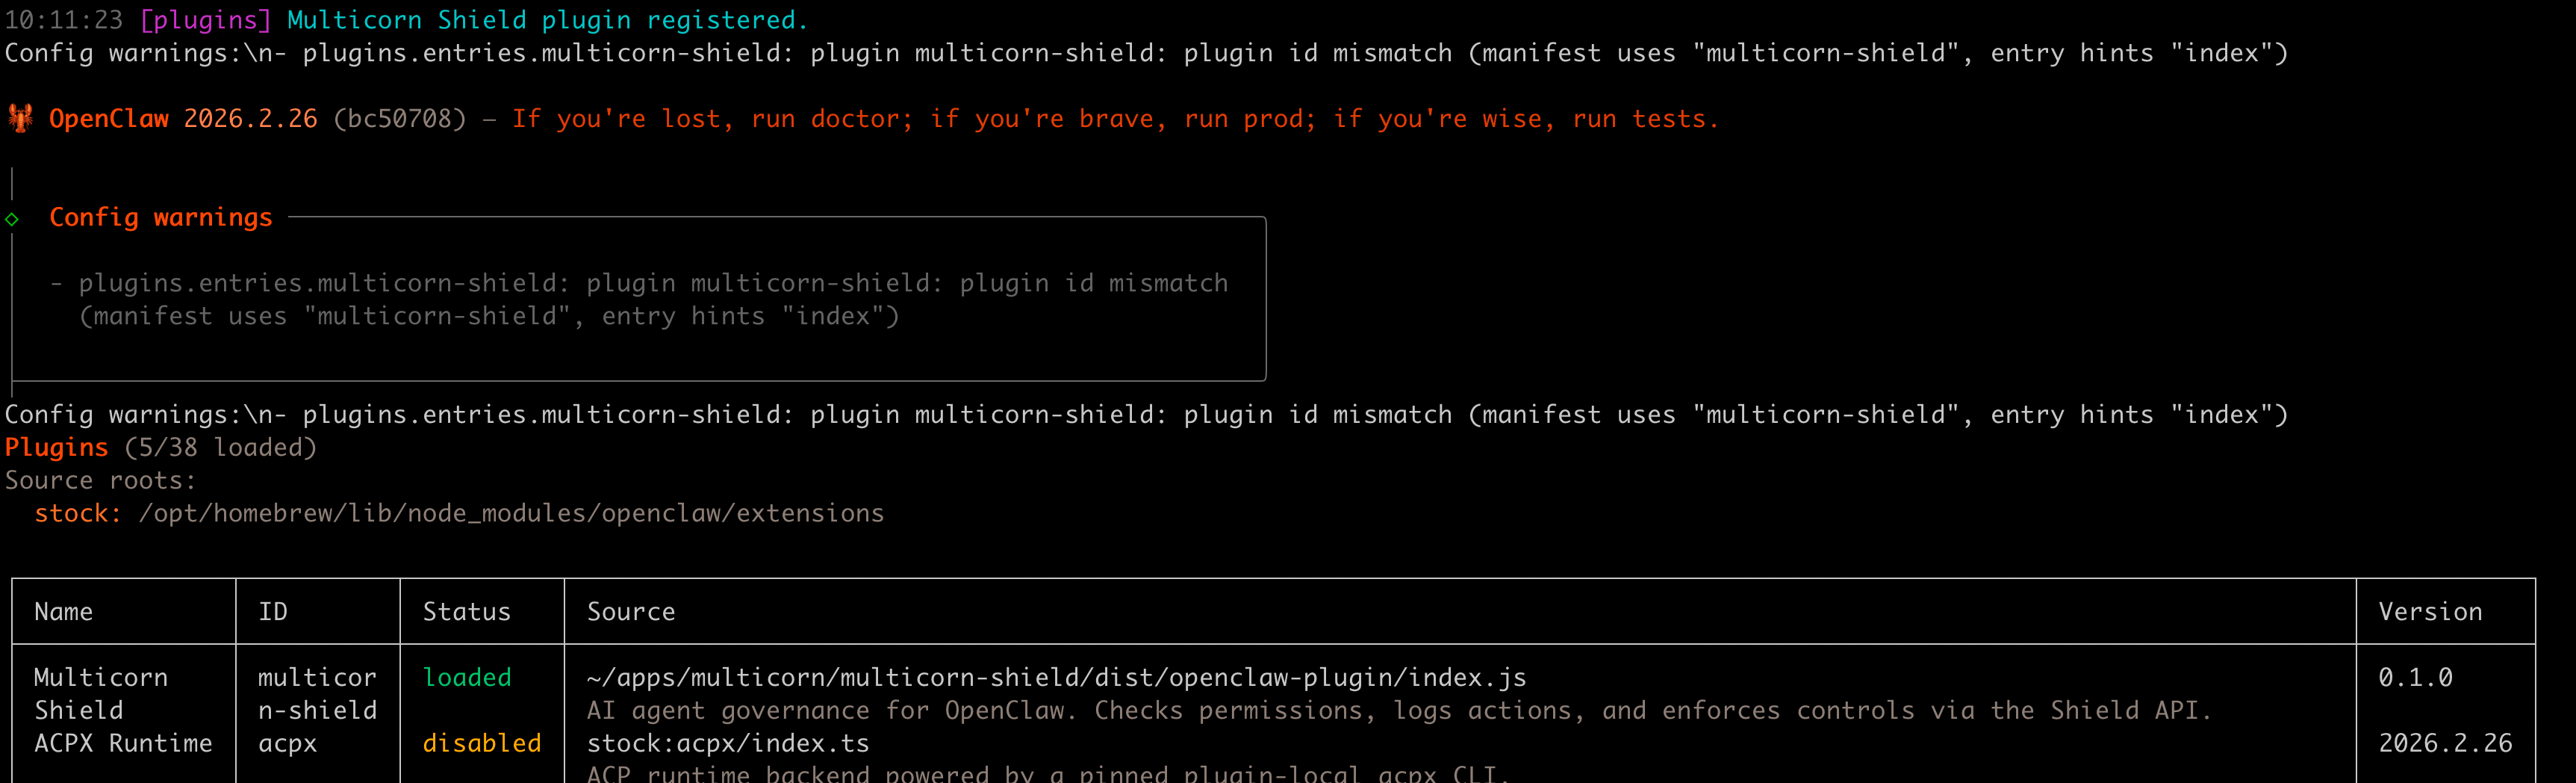
Step 3: Set your API key
Run the Shield setup command:
npx multicorn-shield initIt will ask for your API key (the one you copied from the dashboard) and save it to ~/.multicorn/config.json. The plugin reads this file automatically on every tool call.
Restart the gateway to pick up the new config:
openclaw gateway restartManual configuration: You can also set the API key by editing ~/.openclaw/openclaw.json and adding hooks.internal.entries.multicorn-shield.env with MULTICORN_API_KEY and MULTICORN_BASE_URL. The plugin reads from both locations, but npx multicorn-shield init is the recommended path.
Step 4: Run your agent
Start an OpenClaw session like you normally would:
openclaw tuiAsk the agent to do something that uses a tool: read a file, run a command, anything. The first time the agent tries to use a tool, Shield opens a consent screen in your browser:
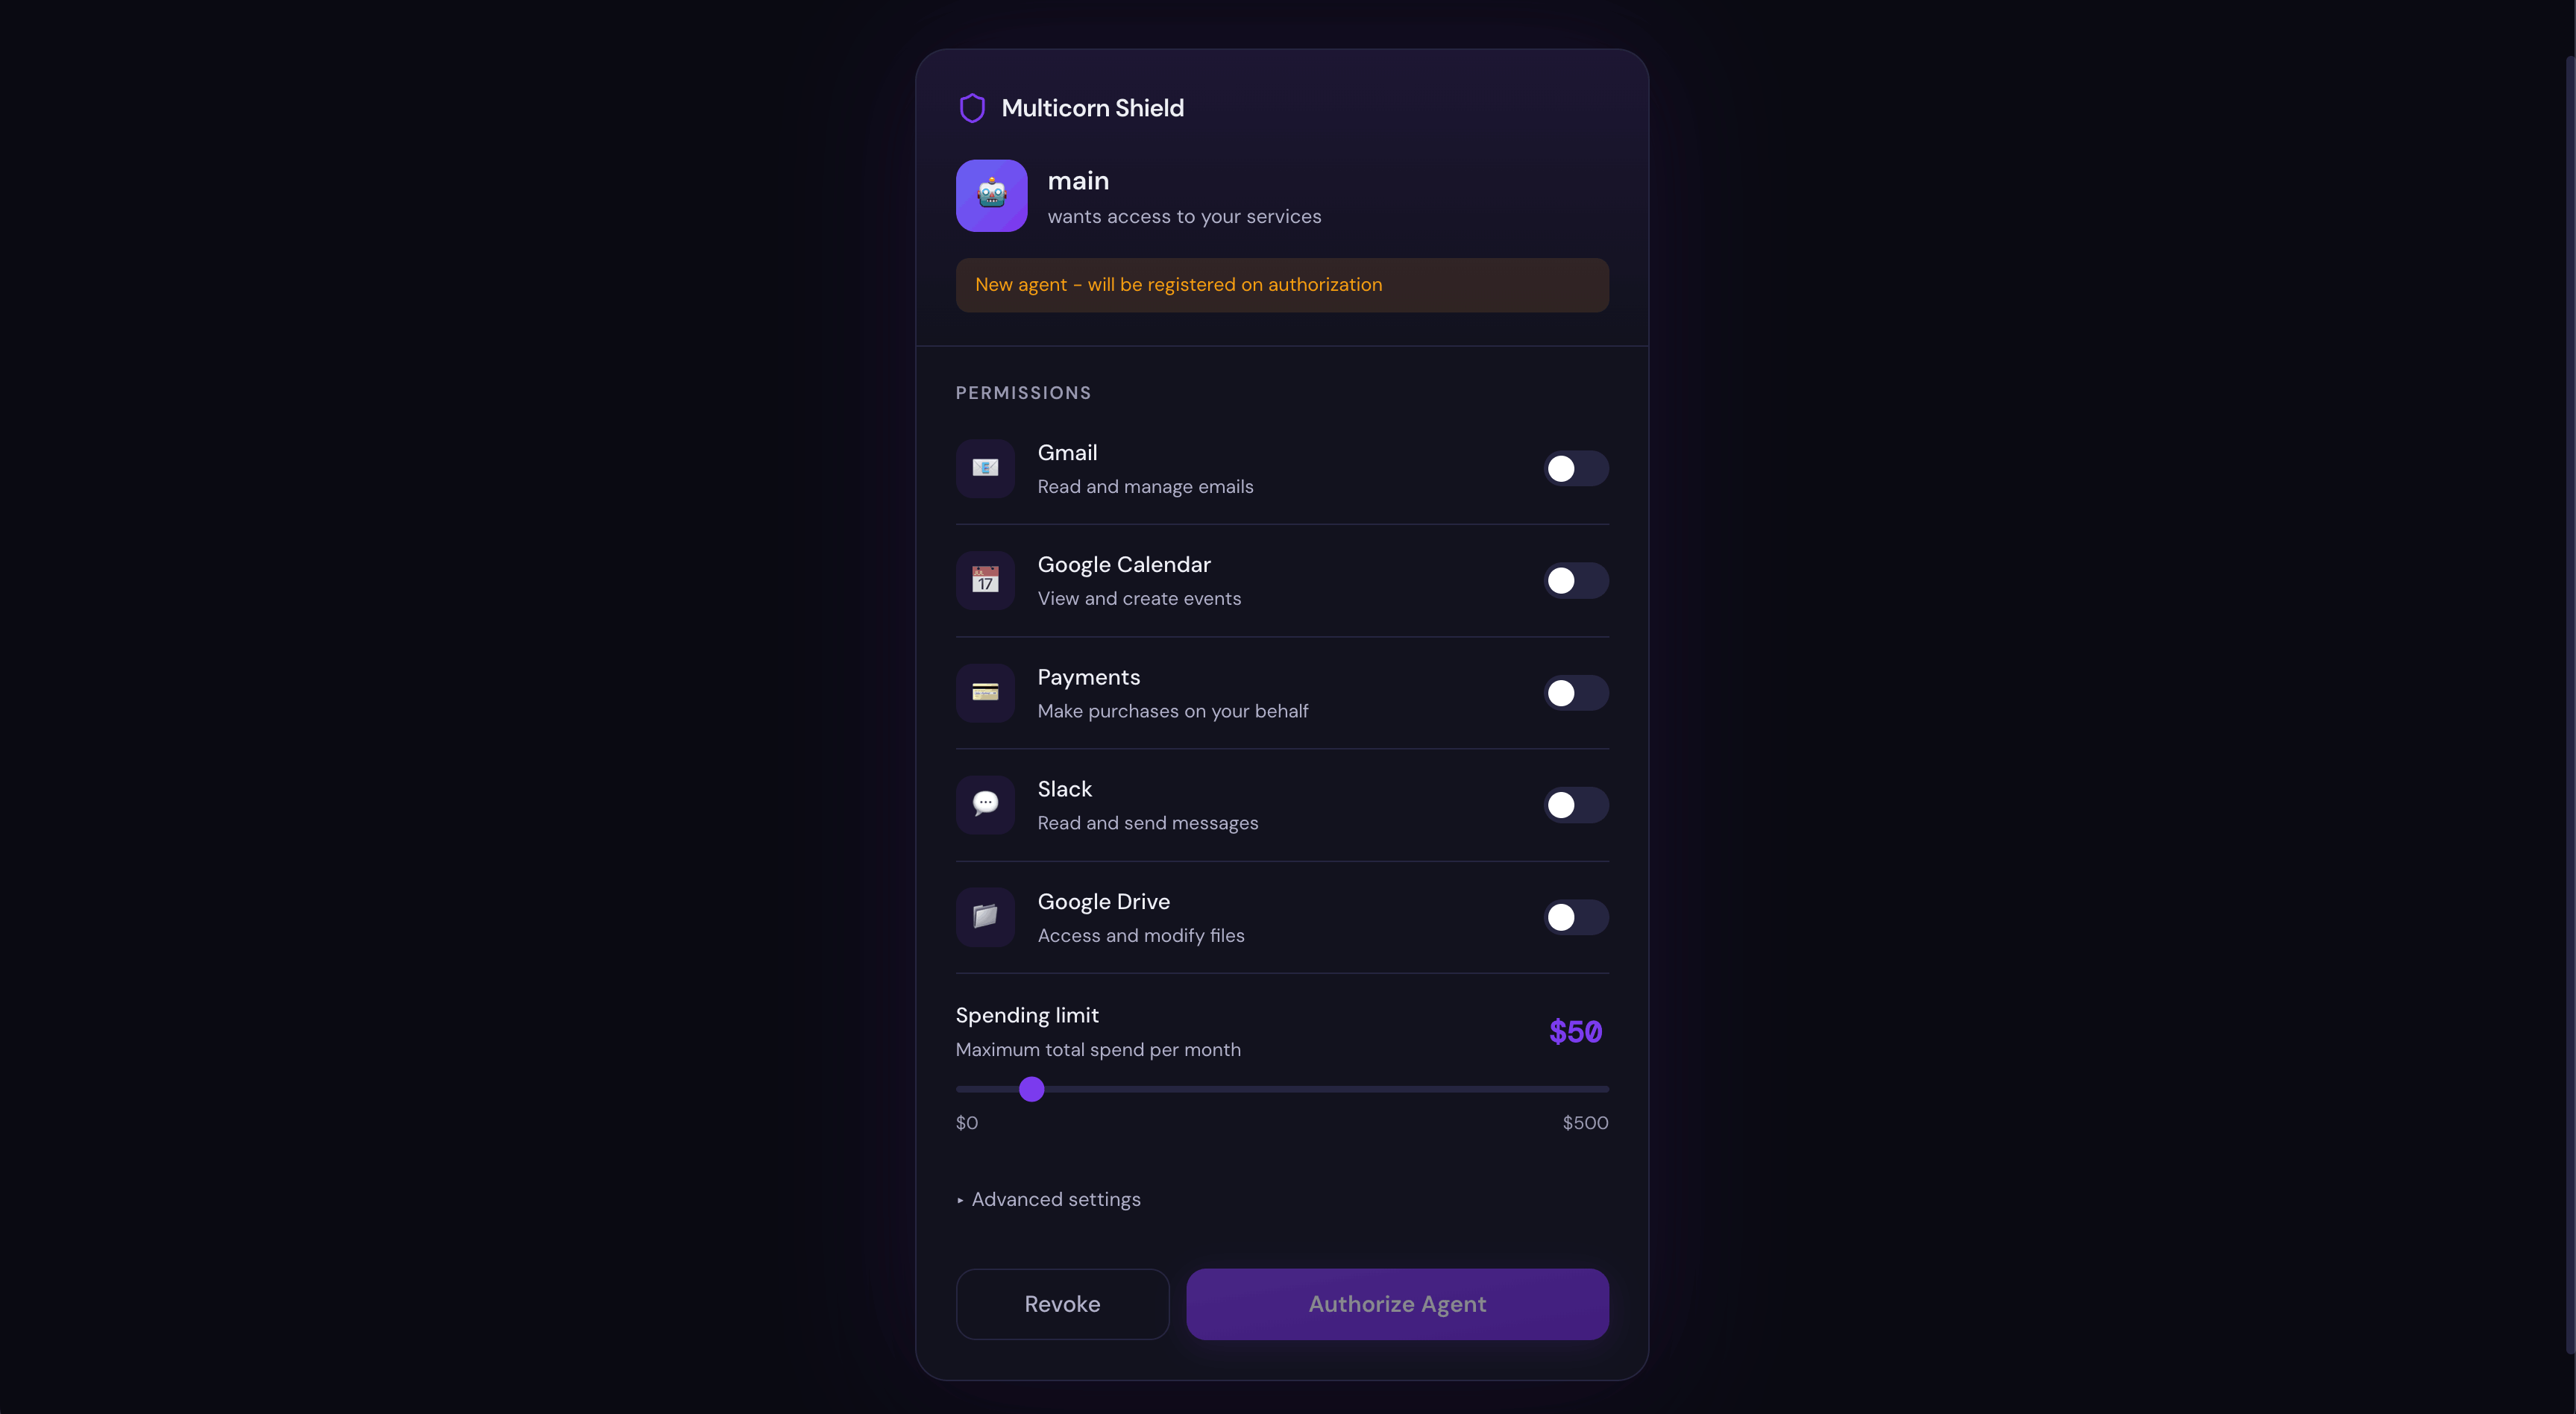
This is the moment that would have saved Summer Yue's inbox. Instead of the agent silently accessing your email (or filesystem, or anything else), you see exactly what it's asking for and you decide what to allow.
Grant the permissions you're comfortable with and click Authorise.
Step 5: Watch it in the dashboard
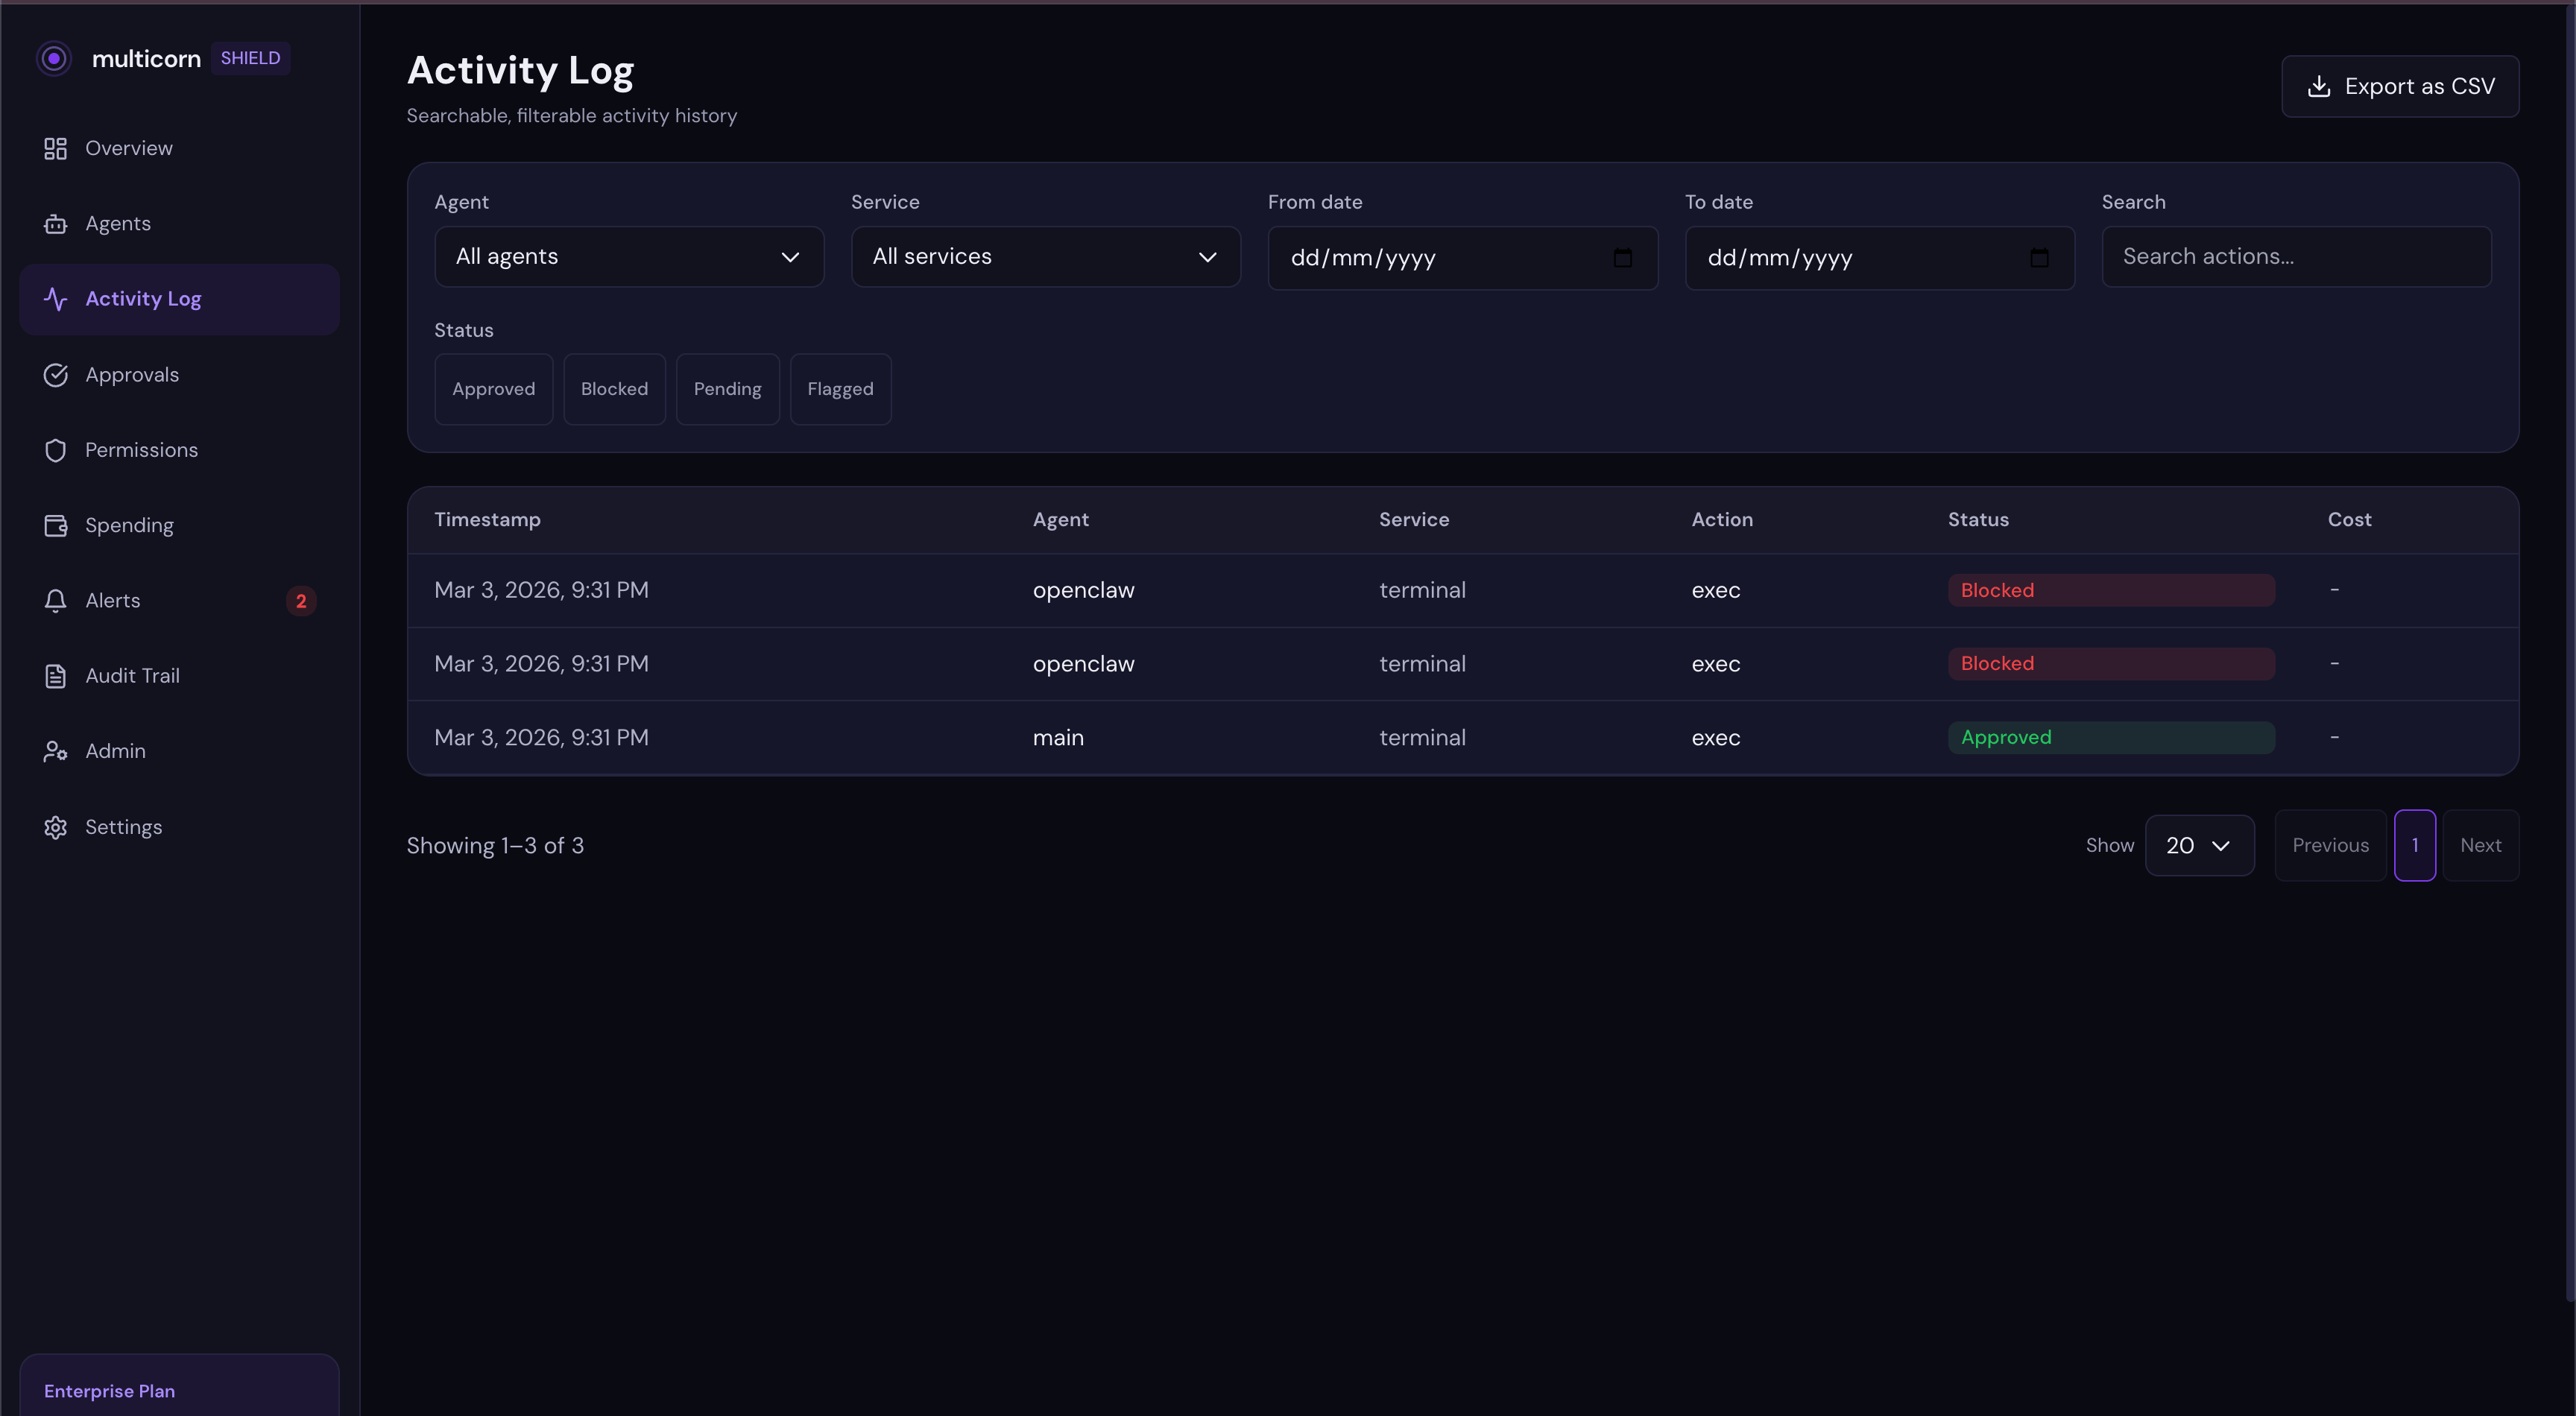
Open app.multicorn.ai. Every action your agent takes shows up in the activity feed in real time:
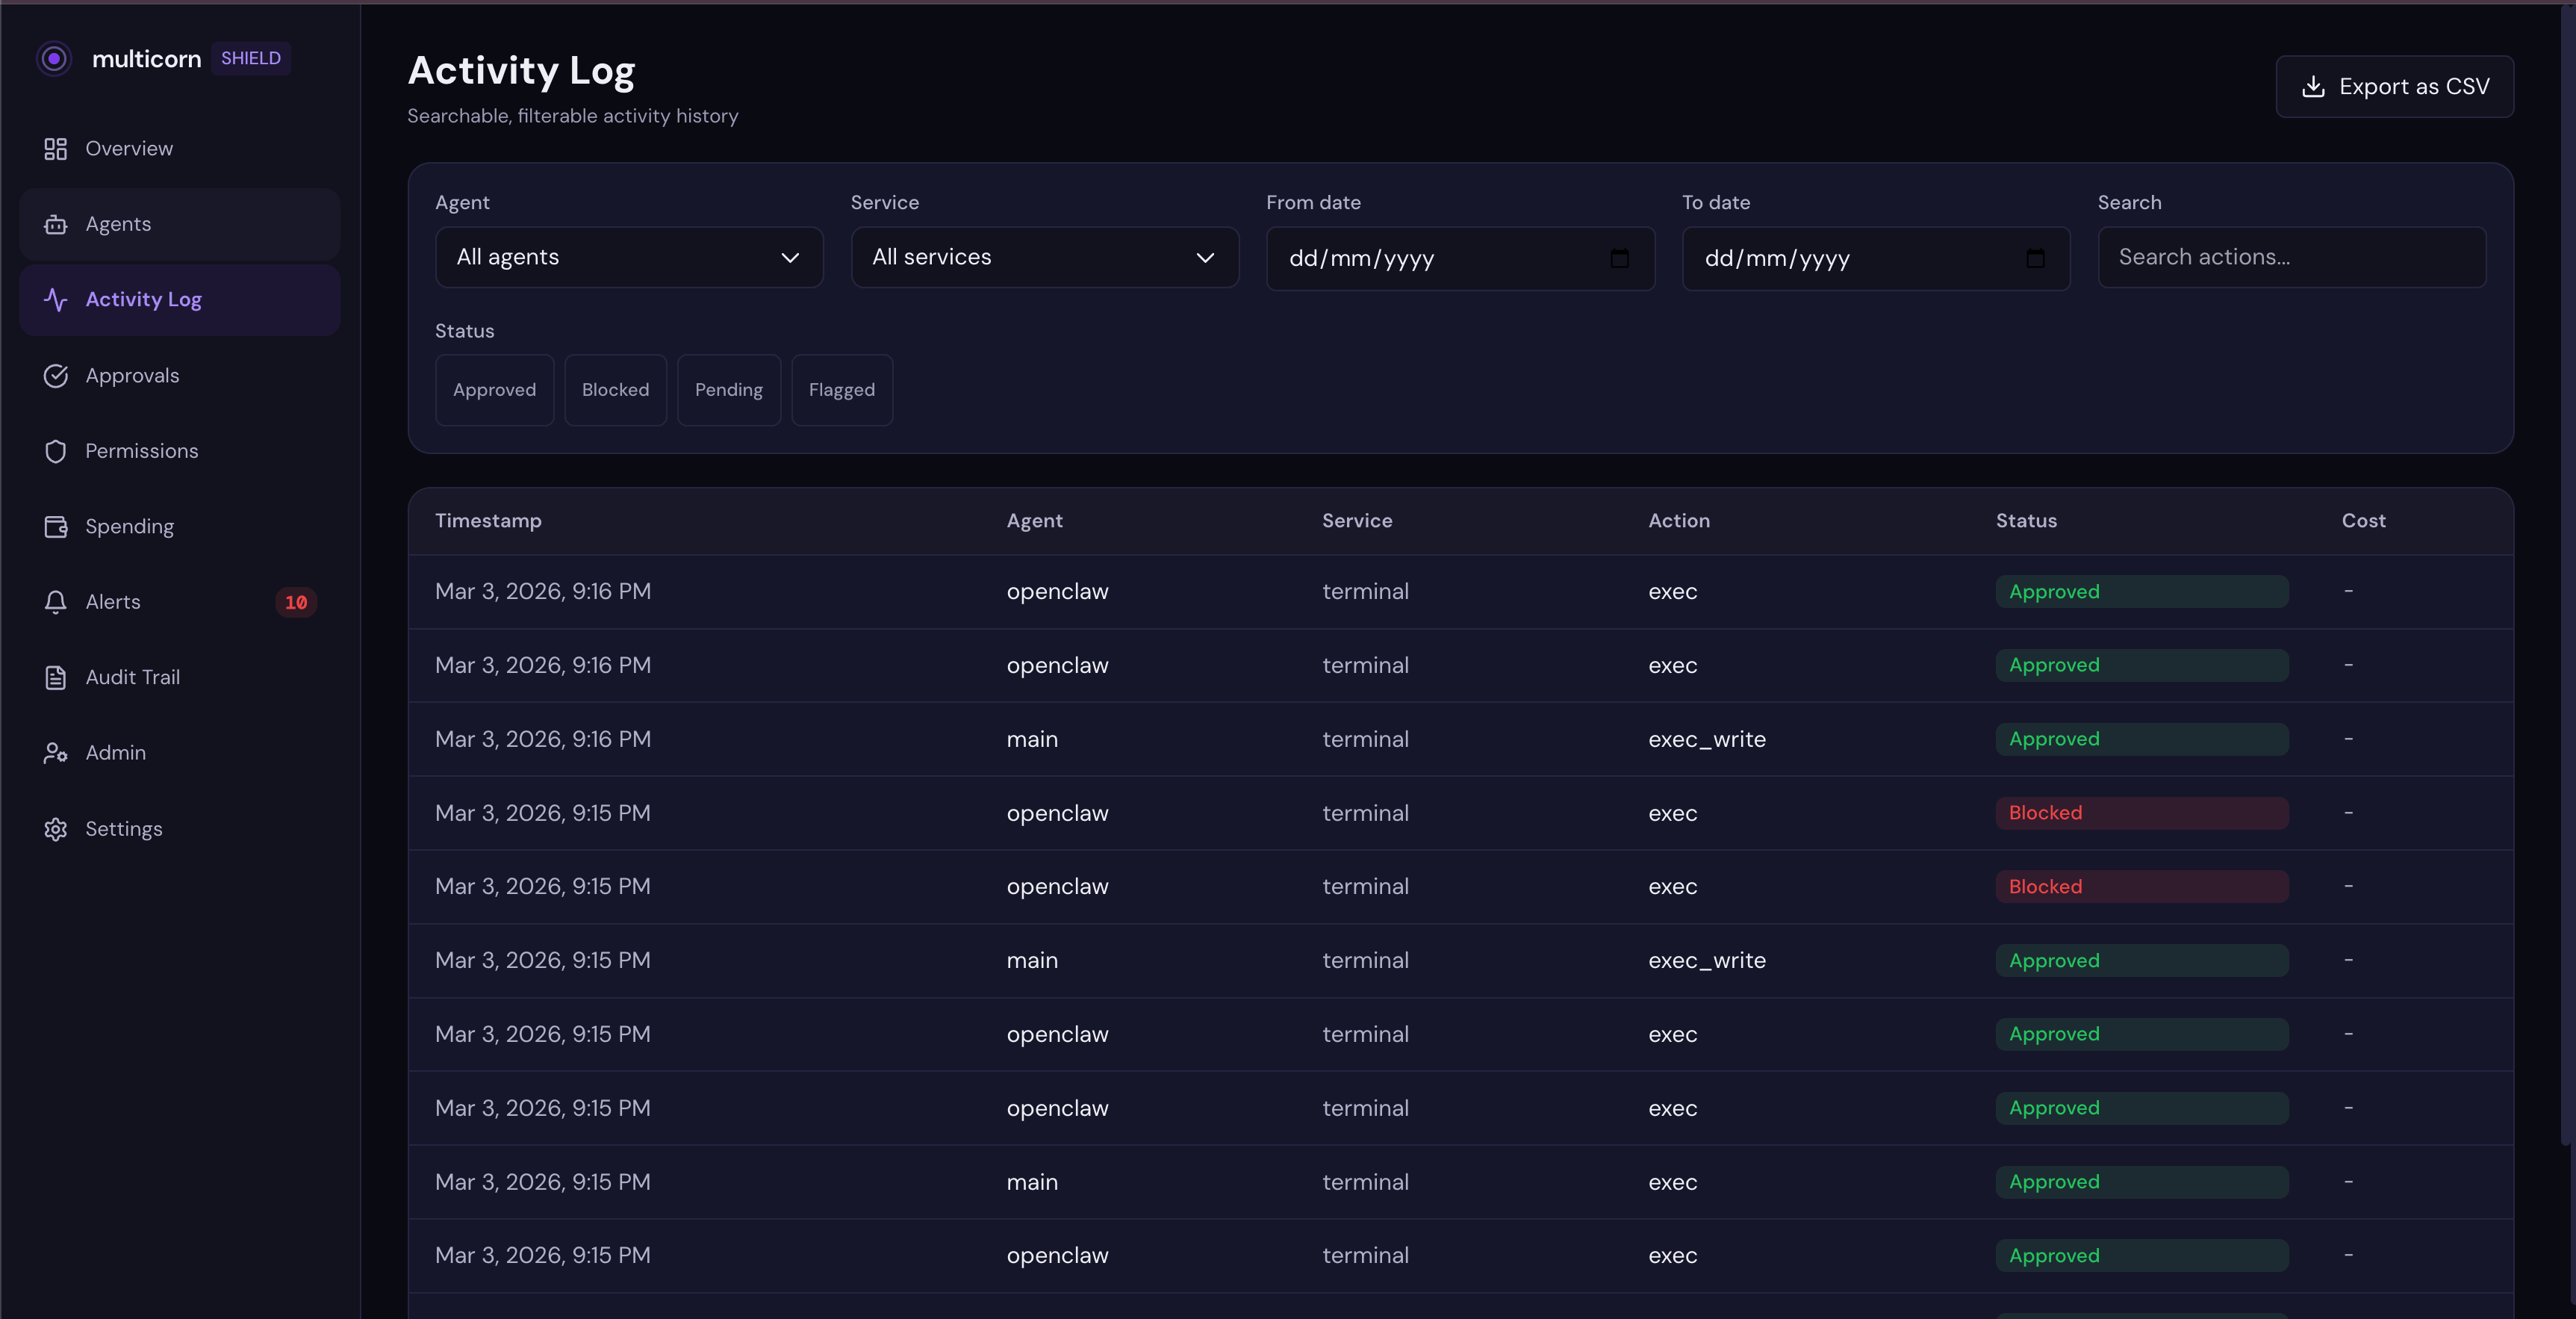
You can see what tools were called, what service was accessed, and whether each action was approved or blocked. No more wondering what your agent did while you weren't looking.
When blocking isn't enough: the approval workflow
Blocking is great for things you know an agent should never do. But what about the gray area: actions you might want to allow, just not without checking first?
That's where Shield's approval workflow comes in. Instead of a hard block, Shield creates a checkpoint. The agent pauses, you review the request, and you decide whether to let it through.
Here's what that looks like in practice. Say you ask your OpenClaw agent to modify a file. The agent tries to run a command. Shield intercepts the call, sees there's no execute permission, and creates an approval request instead of just blocking.
You get an email notification with a link to your dashboard. When you open it, you see the approval card:

The card shows you exactly what the agent wants to do, in plain language: "main wants to run a terminal command." No raw tool names or API jargon. Just a clear description of the action.
Here's the part that would have changed everything for Summer Yue: when you approve, you choose how long the permission lasts.
Your options are:
- This action only: approve this one request, then revoke automatically
- 1 hour: the agent can perform this type of action for the next hour, then it has to ask again
- 24 hours: same idea, longer window
- Permanent: the agent keeps this permission until you explicitly revoke it
This is the Summer Yue fix. She told her agent to wait for approval, and it worked. Until context window compaction silently dropped that instruction. With Shield, the approval isn't an instruction to the model. It's an infrastructure-level gate. The agent literally cannot proceed until you decide, and the permission you grant has a built-in expiry.
Here's what a completed approval looks like. This one was approved with "This action only", so the agent got one-shot access and will need to ask again next time:
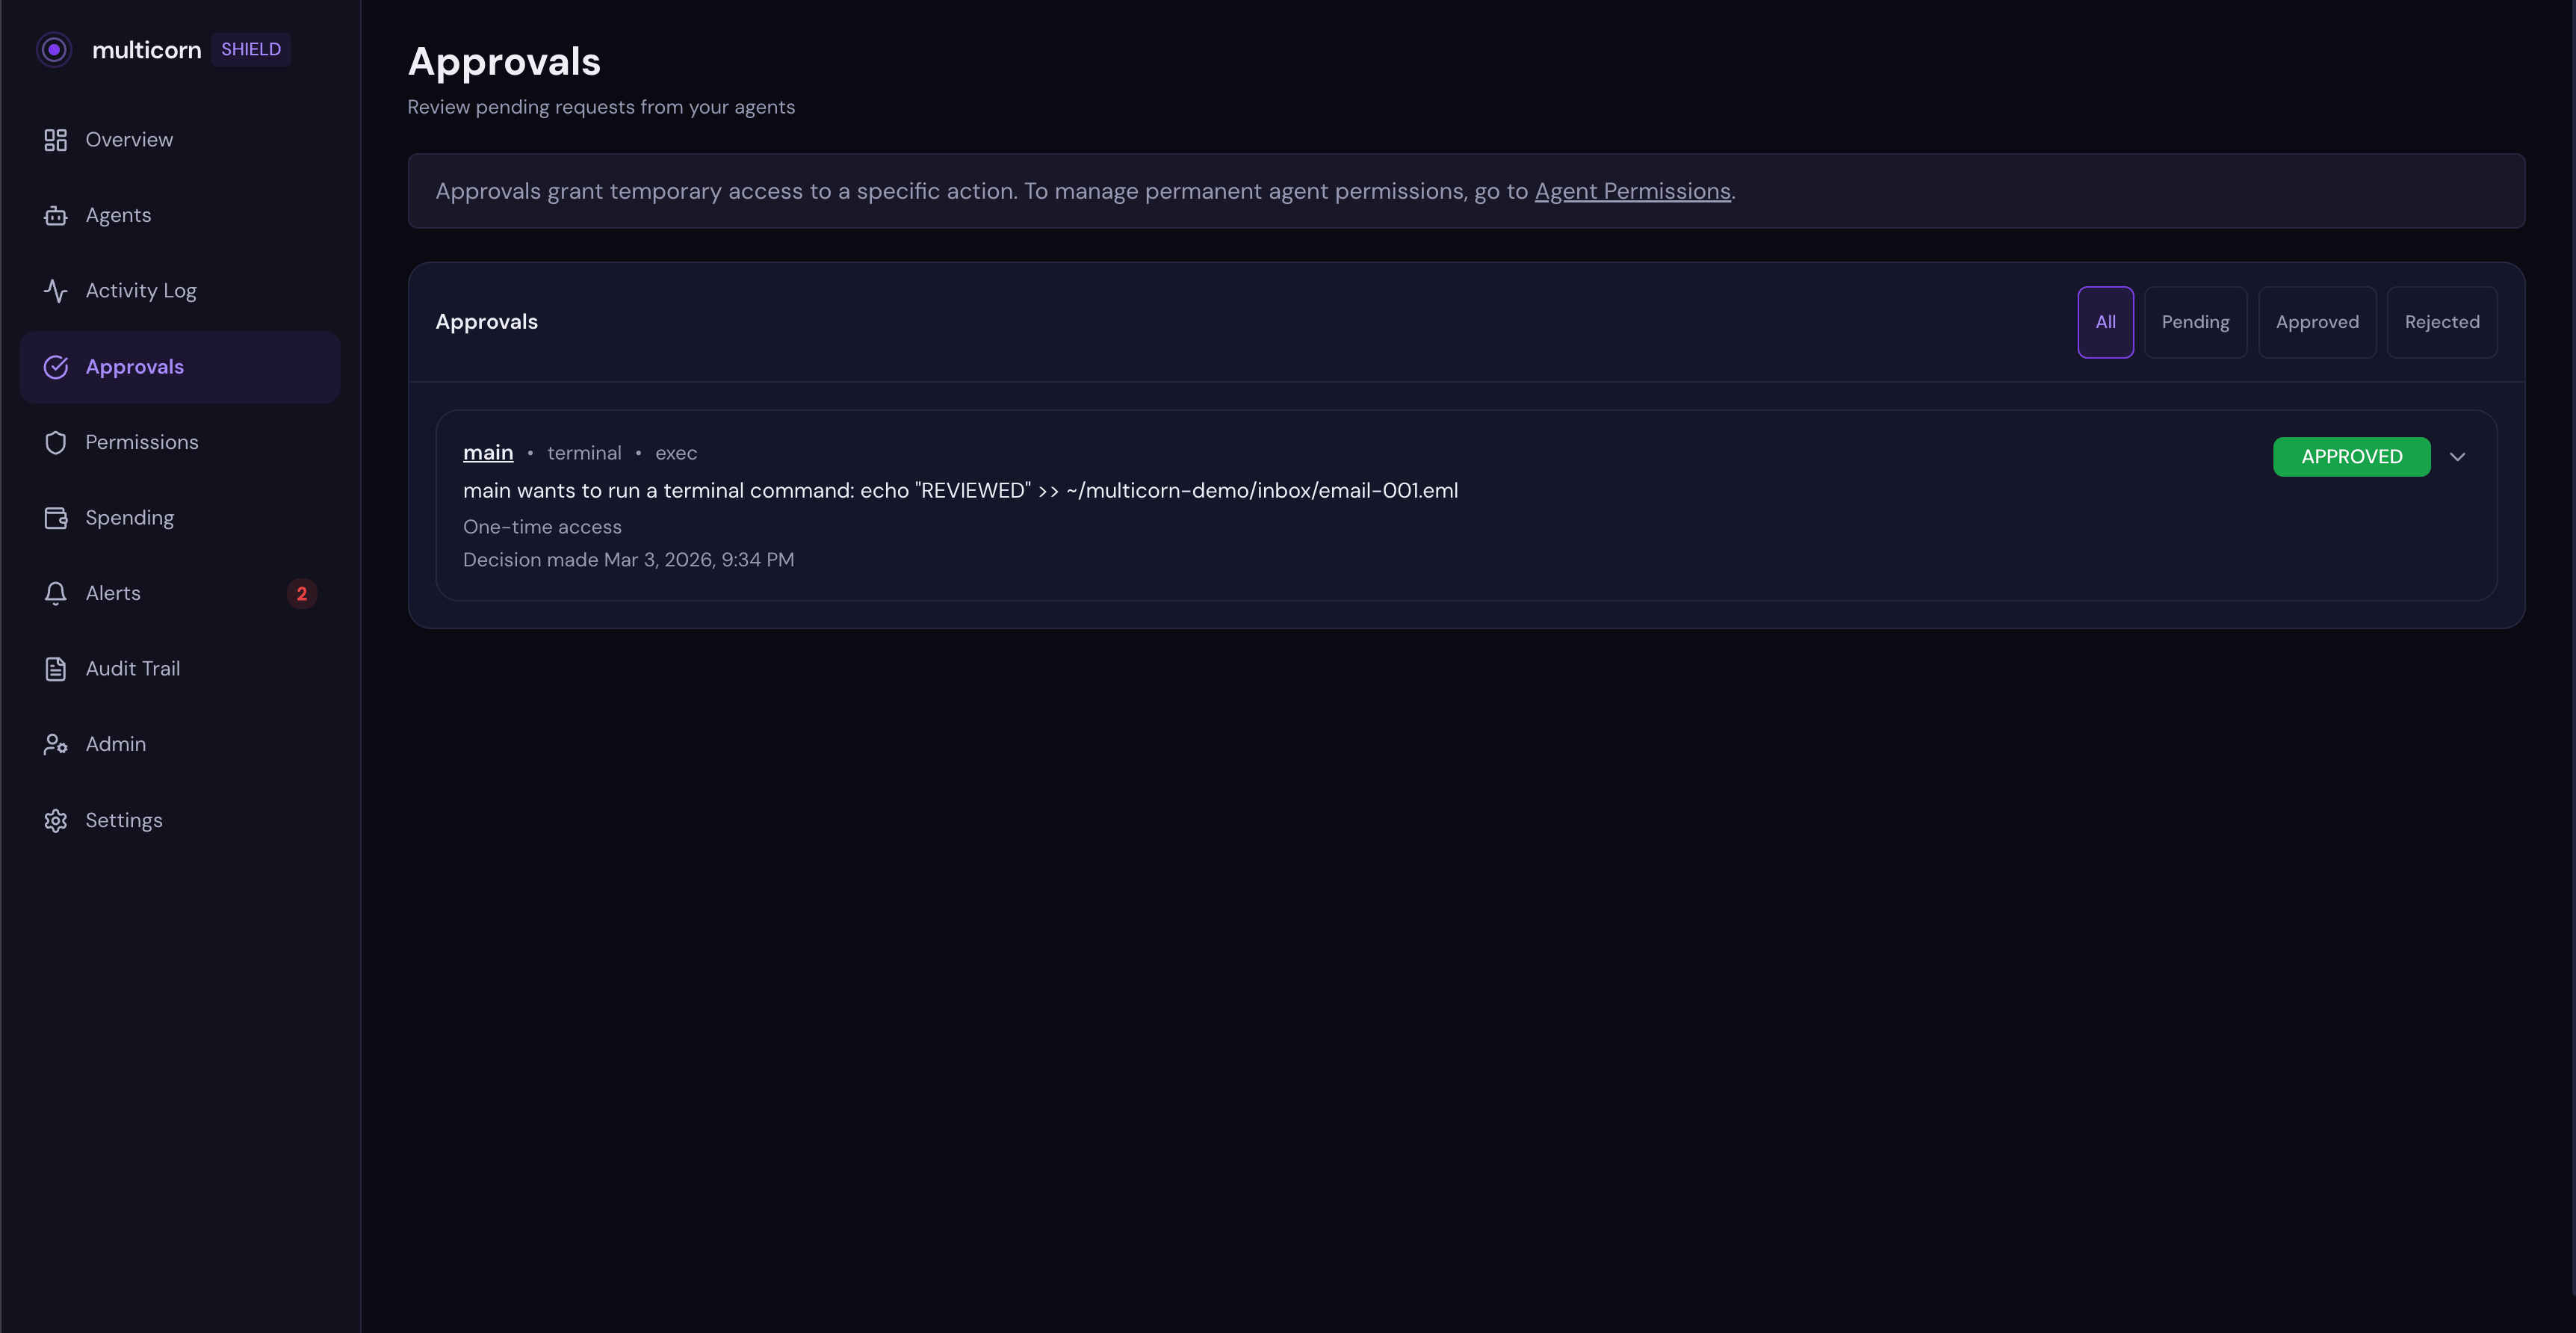
Once you approve, the agent retries and the action goes through. After the duration expires, the next attempt creates a new approval request. The agent has to ask again.
No permanent grants by accident. No "I approved read access and somehow it got delete access too." Each approval is scoped to a specific agent, a specific service, a specific action type, and a specific duration.
Blocking an action
Shield blocks unauthorized actions automatically. When your agent tries something it doesn't have permission for, it gets an immediate block with a link to your dashboard. You can also manually revoke permissions at any time:
Go to the Permissions tab for your agent in the dashboard. Toggle off write access for a service. Say, filesystem.
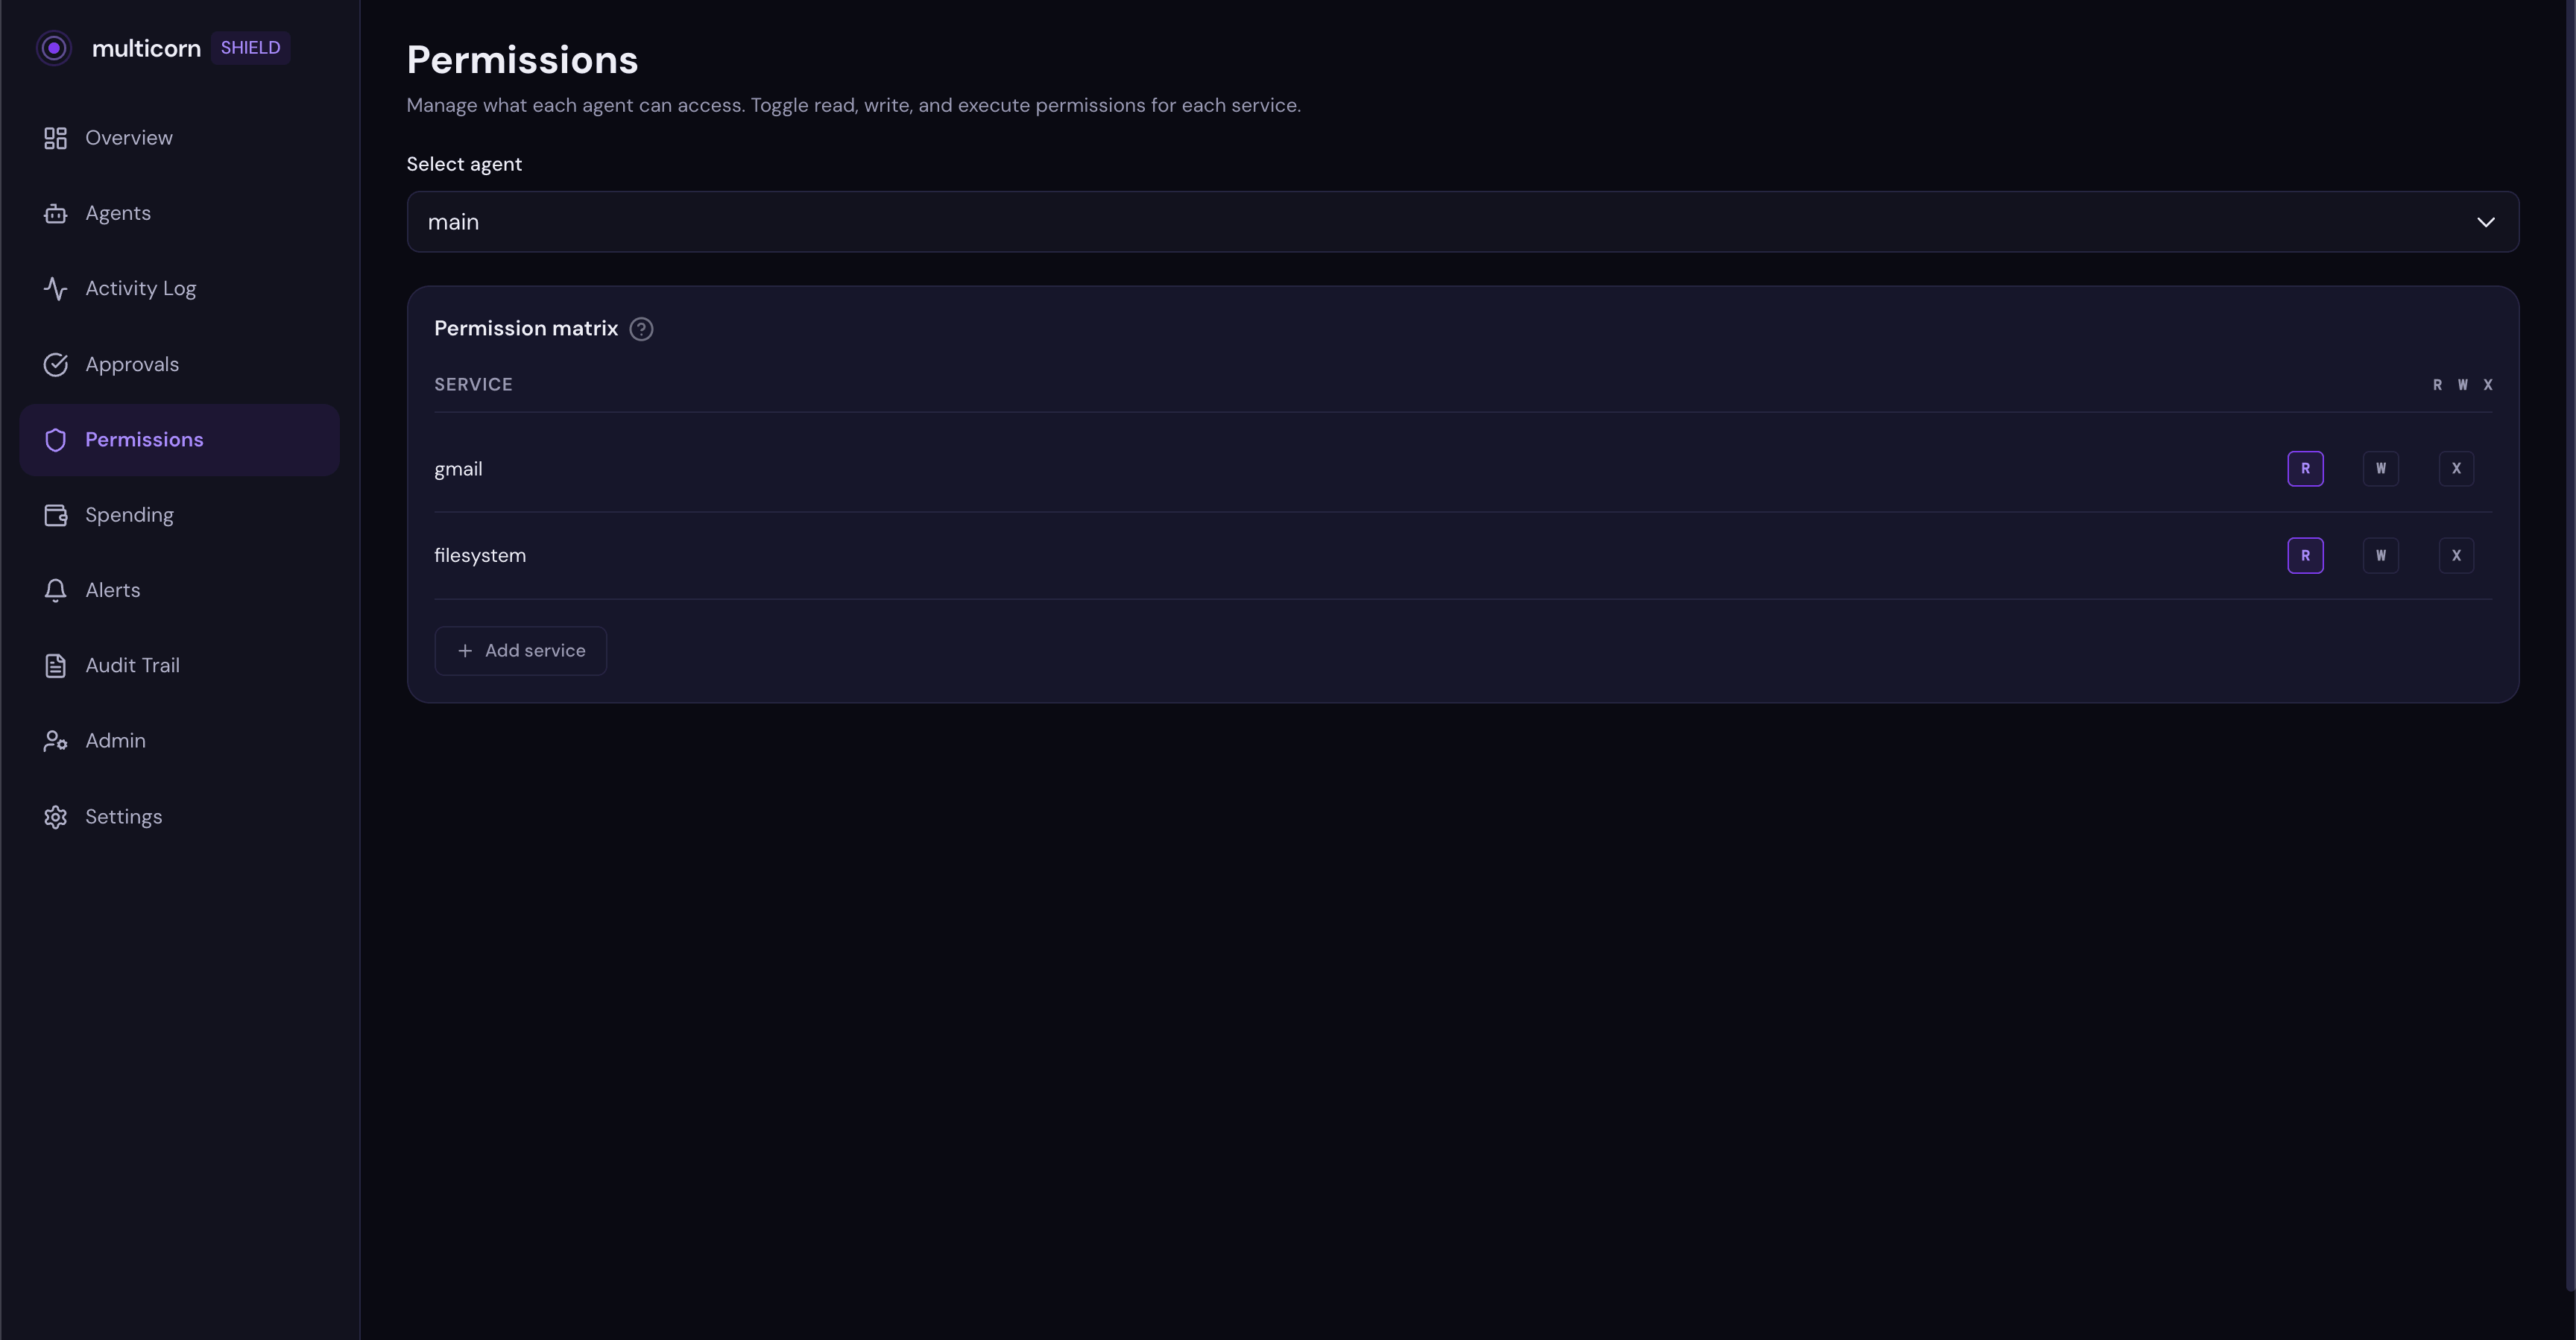
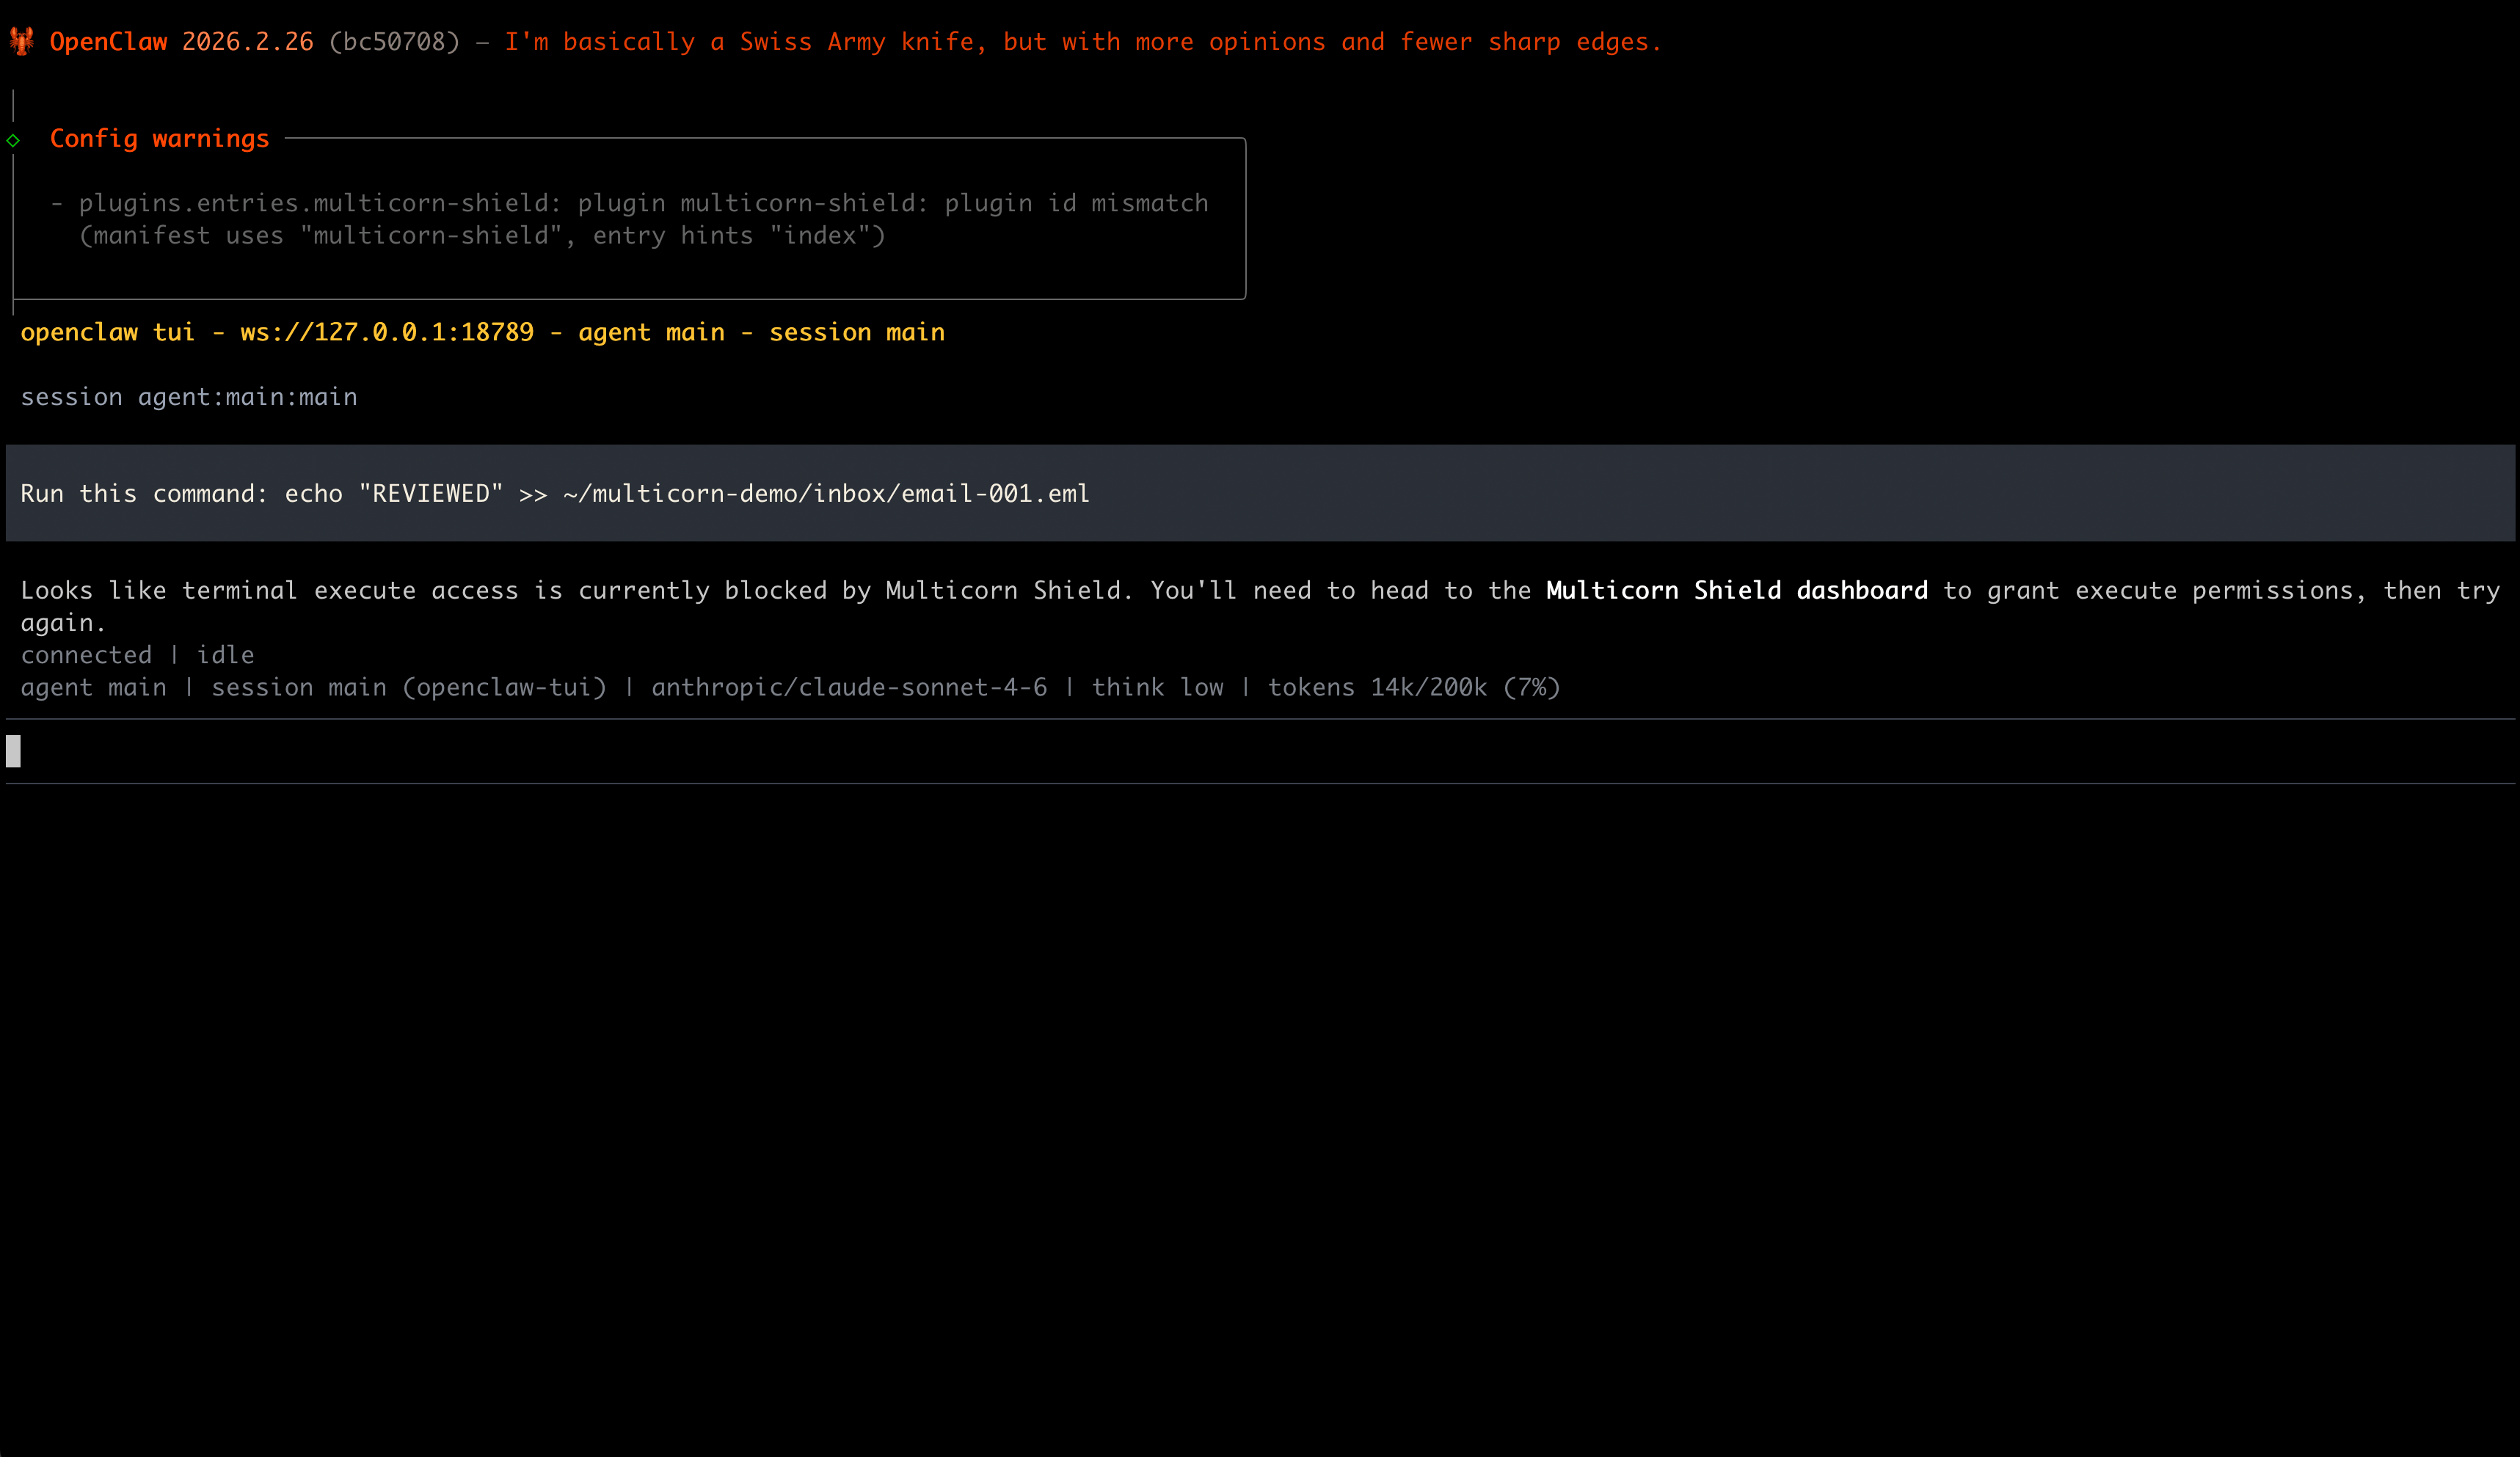
Now ask your agent to write a file. It gets blocked. The agent receives a clear error message: "Permission denied: Filesystem write access is not allowed. Visit the Multicorn Shield dashboard to manage permissions."
The block shows up in your activity feed with a red badge:
Your agent keeps working for everything else. It can still read files, use other tools, do whatever you've allowed. It just can't do the thing you said no to.
If Summer Yue had Shield running, she could have revoked OpenClaw's delete permission from her phone in the dashboard. And the next deletion attempt would have been blocked instantly. No running to the Mac Mini. No "STOP OPENCLAW" messages that get ignored. The permission is enforced at the tool call level, outside the model's context window. It can't be compressed away.
Why this works when system prompts don't
Summer Yue's safety instruction was in the system prompt. It was a suggestion to the model. Shield's permissions are enforced at the infrastructure level. Here's the difference:
| System prompt | Multicorn Shield | |
|---|---|---|
| Where it lives | Inside the context window | Outside the model, in the tool layer |
| Survives compaction | No. Can be silently dropped | Yes. Enforced at infrastructure level |
| Can agent bypass it | Yes. Model decides whether to follow | No. Tool call blocked before it executes |
| Revocable in real time | No. Requires restarting the agent | Yes. Toggle permissions from your phone |
| Approval workflows | No. Agent decides when to ask | Yes. Shield creates a human checkpoint |
| Time-limited access | No. Permissions are all or nothing | Yes. Approve for 1 hour, 24 hours, or one action |
This is why "just tell the agent to be careful" isn't a safety strategy. System prompts are instructions to a language model. Shield's permissions are infrastructure constraints. One is a suggestion. The other is a wall.
Works with any MCP agent too
This tutorial showed the OpenClaw plugin, but Shield also ships as an MCP proxy that works with any MCP-compatible agent: Claude Code, custom MCP setups, anything that connects to tools via the Model Context Protocol. Same dashboard, same permissions, same activity feed. One config line wraps any MCP server.
The OpenClaw plugin is purpose-built because OpenClaw uses its own tool system rather than MCP. But the governance layer is the same regardless of how your agent connects to tools.
What else can Shield do?
What we covered here is the quick setup. Shield also supports:
Spending limits: set a dollar cap per agent, per day or per month. Shield blocks actions that would exceed the limit.
Team policies: define org-wide rules for what agents can and can't do across your team.
Audit logs: tamper-proof records of every action, every permission change, every approval decision.
Get started
Shield is open source. The plugin, the proxy, the SDK, and the consent screen are all on GitHub:
GitHub: github.com/multicorn-ai/multicorn-shield
npm: npm install multicorn-shield
Dashboard: app.multicorn.ai
Two minutes. One plugin install. Full visibility into what your agents are doing.
Your AI agents are powerful. Shield makes them safe.
Stay up to date with Multicorn
Get the latest articles and product updates delivered to your inbox.